Actions
Use Planio's Git repositories with Eclipse
This guide explains how to set up Eclipse to use Planio's Git repositories using EGit. Both Eclipse and EGit are free and can be downloaded from eclipse.org.
- Table of contents
- Use Planio's Git repositories with Eclipse
Set up a key pair using Eclipse and store your public key in Planio
- Select "Window" -> "Preferences" from the Eclipse application menu.
- Navigate to "General" -> "Network Connections" -> "SSH2".
- Select the "Key Management" Tab.
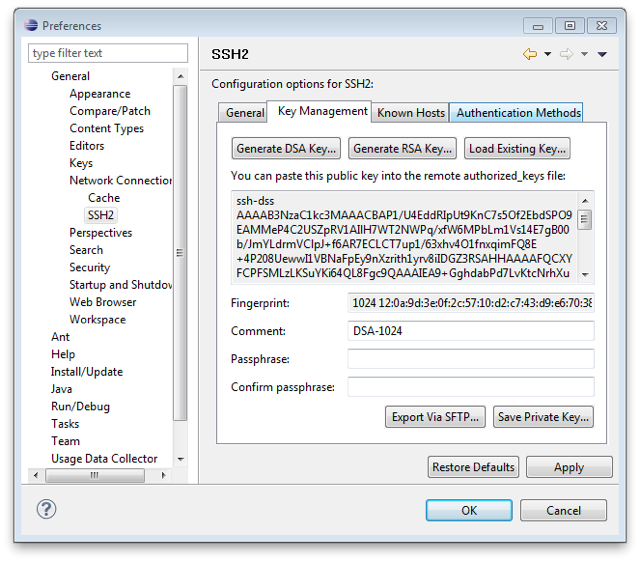
- Click "Generate RSA Key...".
- Click "Save Private Key..." and store it as "id_rsa" in the ".ssh" directory within your home folder.

- Copy the public key (displayed in the text area) into your clipboard.
- Open Planio in your browser, navigate to "My account" -> "Public keys" and click on "New value".
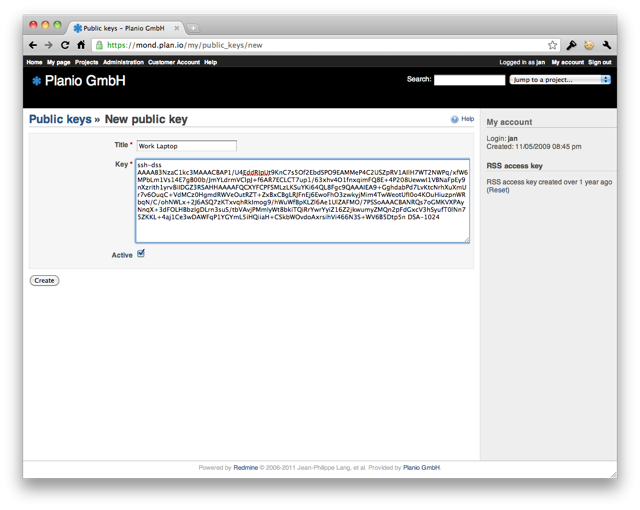
- Enter a title for your key. It makes sense to have one key per computer you use, so a good name would be e.g. "Work Laptop".
- Paste the key you copied to the clipboard in the "Key" field and click on "Create".
Install EGit
- Select "Help" -> "Install New Software...".
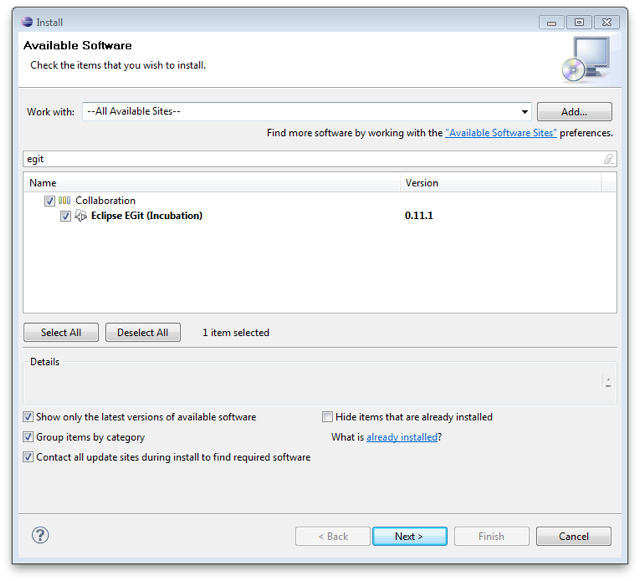
- Select "All Available Sites" from the drop down next to "Work with".
- Type "egit" in the search field.
- Check the box next to "Eclipse EGit (Incubation)" and click on "Next >", accept the terms and click on "Finish" to install EGit.
Make your first commit
- Open a context menu for your project, select "Team" -> "Share Project...", then select "Git" and click "Next >".
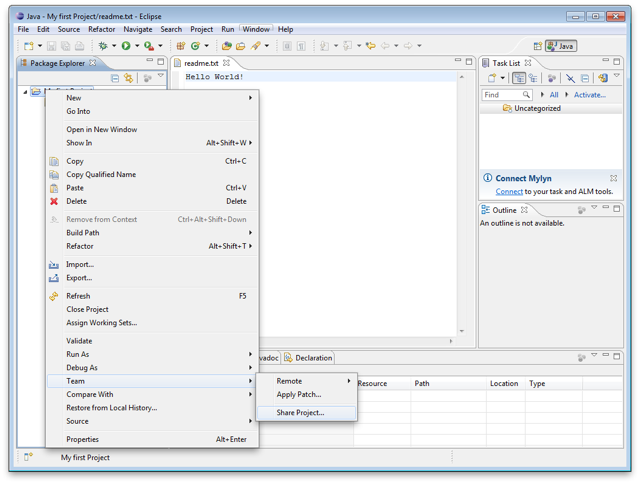
- Select your project and click on "Create Repository" to create a local Git repository, then click "Finish".
- Open a context menu for your project, select "Team" -> "Add" to add your local changes to the cache.
- Open a context menu for your project, select "Team" -> "Commit" to commit your local changes to the (local) repository.

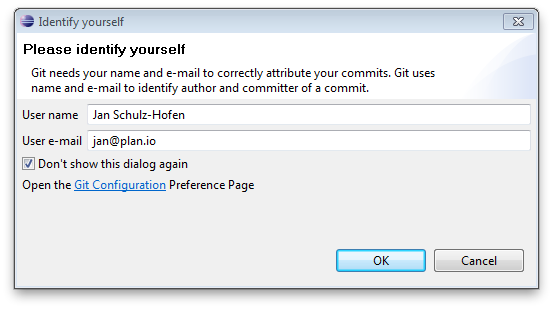
- Enter a commit message and perform your first commit. If being asked for your name and email address, please enter the information as needed.
- Open a context menu for your project, select "Team" -> "Remote" -> "Push..." and enter your Planio repository URI in the URI field. You can find your Planio repository URI in your Planio account by navigating to the "Repository" tab.
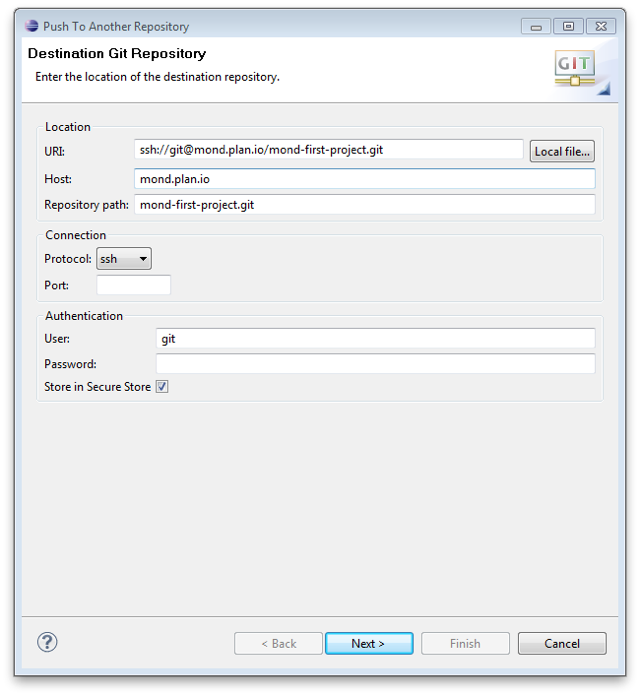
- Then, click on "Next >" and select "master [branch]" as a source ref and confirm "refs/heads/master" as a destination ref.

- Finally, click on "Add spec", then on Finish.
- If being asked for a password for secure local storage, select a password and click OK. This password is used to encrypt Eclipse data locally, you should not use your Planio password here.
- Your project should have been pushed to Planio's remote Git repository.
Updated by Holger Just over 4 years ago · 5 revisions